I wanted to take my blank wall and create a food preparation area where we could use my existing grill, and I wanted to do it as inexpensively as possible.

Framing
First step was to build the frame. I did this out of treated 2x4s. I needed it to be sturdy because I planned on putting a concrete countertop on it. I had to measure carefully because my patio angles downward towards the grass and I wanted my countertop to be level. I screwed a 2x4 horizontally across the brick the length of my countertop using masonry screws and drilling the holes with a hammer drill, making sure it was level all the way across. I then measured from this 2x4 to the ground in each area where i put in a vertical post. I used a piece of paper at the bottom to make a template of the angle of the cement in each spot so I could cut the bottom of each 2x4 at this angle rather than a 90 degree angle like I would on a level surface. This worked out well for me!!

I took the metal off the right side of my grill, but the left side has a burner and the starter in it so I didn't want to mess with taking those off and finding a spot for them. So I had to make my frame so I could still leave those in place and roll my grill into the middle area.

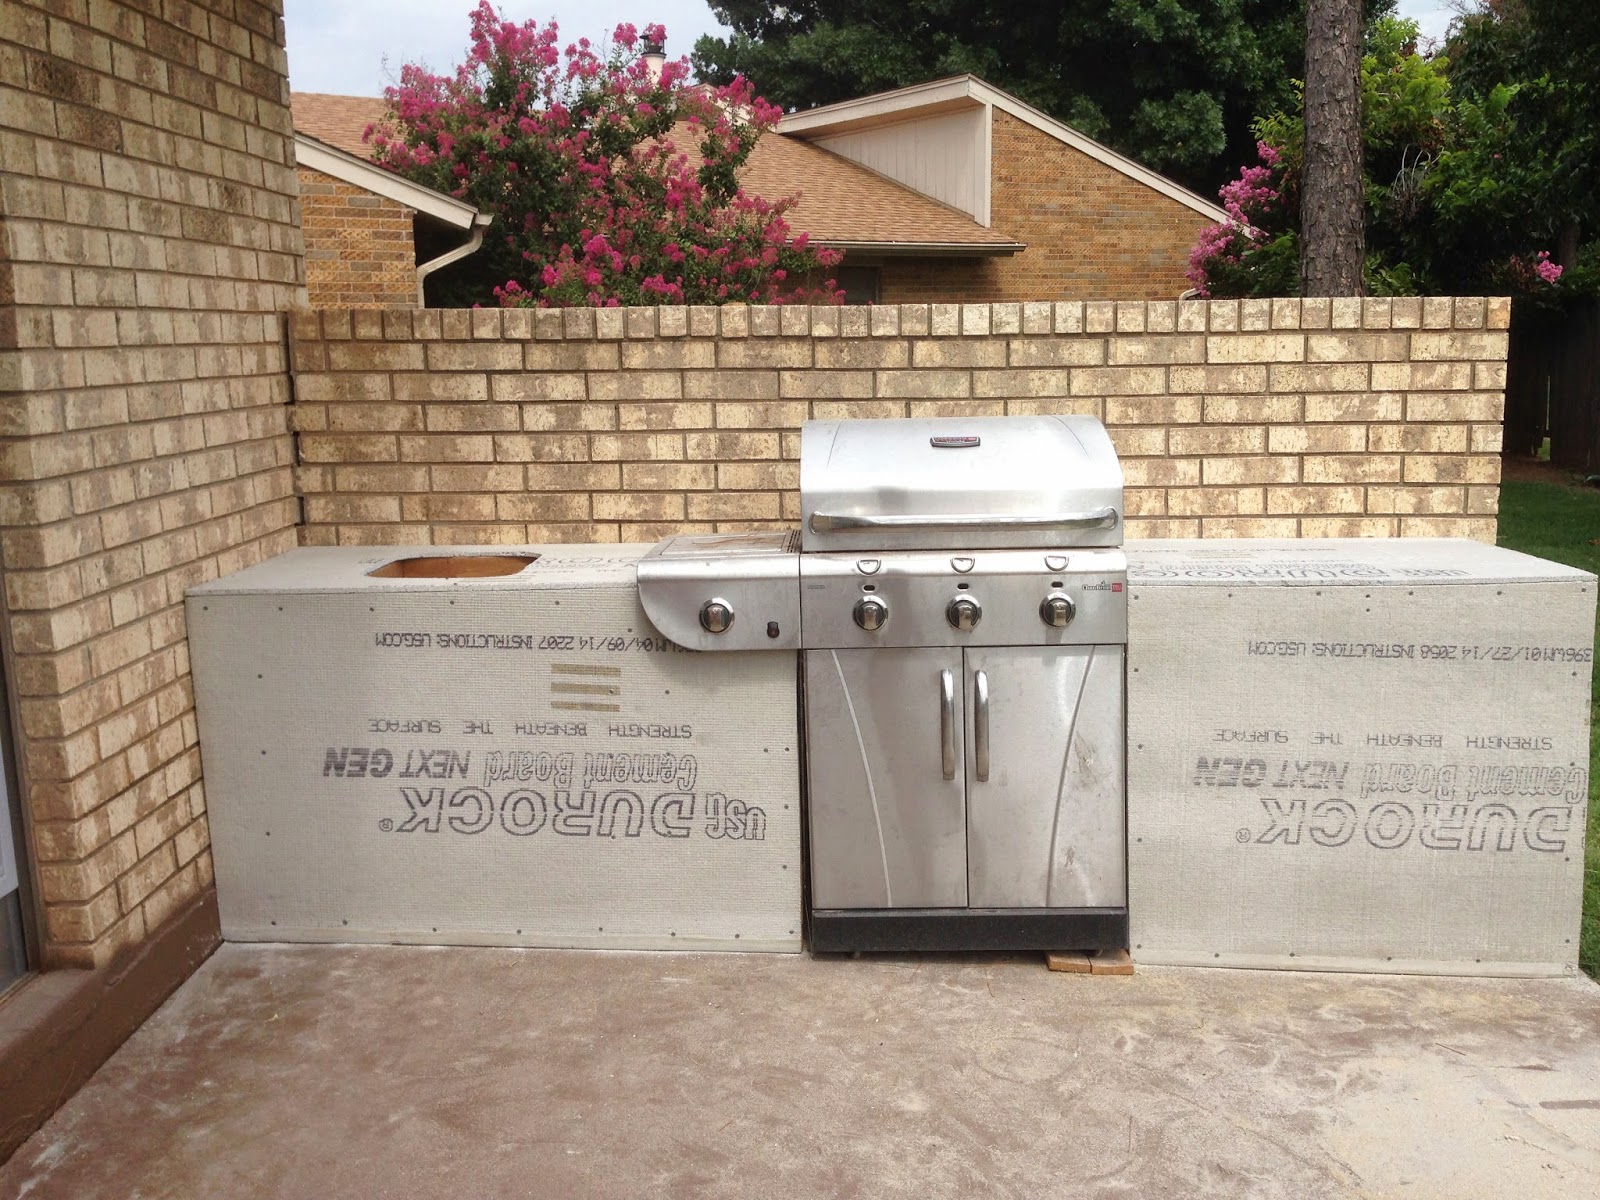
Next step was adding concrete board. I plan on putting a concrete countertop and stone veneer on the sides. I set my concrete boards where i wanted them and simply marked lines where I needed to cut.
My Helpers

Cement board in place.
Next step- Concrete!!
I decided to make a 2 inch thick concrete countertop and poured it in place because I could. I did not add any pigment to this concrete because I plan to stain it the same color as the concrete patio (which you can't really see right now because of all the cement board dust). I framed around my base using melamine boards because they provide a smoother finish than wood, and won't absorb moisture. I marked each strip with a 2 inch line so it would stick up 2 inches all around. The pictures of this are not great. One was taken at night as I finished framing and the other with the sun behind it before I started pouring concrete. But you get the idea.


I have one cutout in the countertop for a sink. I did not need additional holes for a faucet because this is going to be more of an ice and drink area with a drain rather than a functioning sink. You can have sink forms made or find preformed ones, but I didn't want the extra cost of having a form made in the size of my sink. So I hunted around trying to find material that was flexible enough to create the curves of my sink, but strong enough to hold concrete. What I ended up using was a strip of vinyl siding. It took some wrestling to get it in the form and screwed in. I'm hoping the the lip of my sink will hide any imperfections :)

I also reinforced the vinyl siding with some boards on the straight areas, but I don't know if it was really needed.

I wanted the countertop to extend out over the exposed sides so I use a 2x4 to extend out the countertop surface. Once I got all of the framing for the concrete in place, I used silicone caulking to seal all of the seams.

Then it was time for concrete pouring. I rented a concrete mixer from Home Depot this time. I did a previous project where I mixed the concrete myself in a tub, and I did not want to do that again. The $36 rental for 4 hours was well worth it. Particularly since I was doing this by myself. I used Quikcrete Countertop mix. Home Depot can special order this for you. It costs more (about $15 a bag) than regular concrete, but contains plasticizers and whatever else you need to add to the concrete to add strength and prevent cracking and shrinking in countertops. Well worth being able to just add water and mix.


I sprayed the edges of the form with cooking spray so they won't stick to the concrete when I remove them. I recommend reading up on pouring your own countertops. There are a ton of websites out there to guide you. I found this one to be pretty thorough-diynetwork concrete countertops, and liked these Imperfectly Polished, Run to Radiance. Do your research!!! I added water to the mixer and then added the concrete. I then added water until the concrete poured off the top of the mixer in thick sheets. You want it to be liquid enough to be pourable and to be able to get bubbles out, but not so liquid that the strength of the concrete is compromised. I poured the concrete in until the mold was filled about halfway. I then used a rubber mallet to pound on the edges to get the bubbles out. I have previously used a reciprocating saw without the blade to vibrate the bubbles out, but I found the rubber mallet to be more effective (and all that pounding is a satisfying way to get out excess energy. I should've recruited some kids for this part!!) After getting bubbles out I placed welded wire steel remesh sheets for support. I then filled the rest of the mold with concrete, smoothing with a magnesium float. After some of the liquid rose and evaporated I used a trowel to smooth the surface even more.

You can see in the right front corner in the pic above that I must not have been very level because the concrete level was lower in that corner once it settled.

Curing the Concrete
Once the concrete is poured, it needs to cure. I didn't really understand the curing process much. This explains it pretty well-Curing Concrete. Basically, proper curing makes the concrete stronger, less permeable, and more durable. You do this by keeping the concrete warm and moist during the curing process. Due to additives, the Quikcrete Countertop Mix can be cured in as short a time period as 18 hours. The longer you cure, the better though. This means with this concrete I could remove the forms after 18 hours, but plan to leave them in place for about a week just to hold more moisture in. For curing, the temperature should be 50-90 degrees and the surface of the concrete should stay moist. Since I am in Texas and the weather was going to be sunny with temperature in the high 80's (really cool for a July day), I needed a way to keep the surface moist. Unless i misted the surface continuously with water (which I can't because we are in a water shortage), the only other way is to put plastic over the concrete. So that's what I did.

No comments:
Post a Comment